For a long time I was searching for a good notetaking app. Handy, something like Notion, I loved the databases, Views and Writing Assistance features in it.
But it also comes with subscription, lock-in, and my notes living on someone else’s server. These might or might not be a big deal for some but i wanted to my sources to confide my environment.
Becauase the moment you start storing ideas, research, and long-term knowledge, you start asking a deeper question:
Where does my thinking actually live?
That’s when I discovered Obsidian.
And things started getting interesting.
Why I Started Looking for a Second Brain
I love being updated and experimenting things, leading me to read and constantly update my knowledge.
- articles
- ideas
- research
- notes
- random thoughts
But here is the thing: Humans forget almost 50% of information within one hour.
Which means most of the things we read… vanish.
A second brain solves this.
It’s essentially a system where:
ideas → captured → connected → searchable → reusable
Instead of remembering everything, you store and connect ideas.
And Obsidian is one of the most powerful tools for this.
Why Obsidian is Special
Obsidian is not just a note taking app.
It’s a knowledge graph built on plain text files.
Everything you write lives as markdown files on your computer.
Example vault structure:
MyVault/
   idea.md
   research.md
   notes.md
   .obsidian/
This gives you some huge advantages:
• Your data is local
• No vendor lock-in
• Markdown based
• Offline first
• Highly customizable
One of the most beautiful features is the graph view.
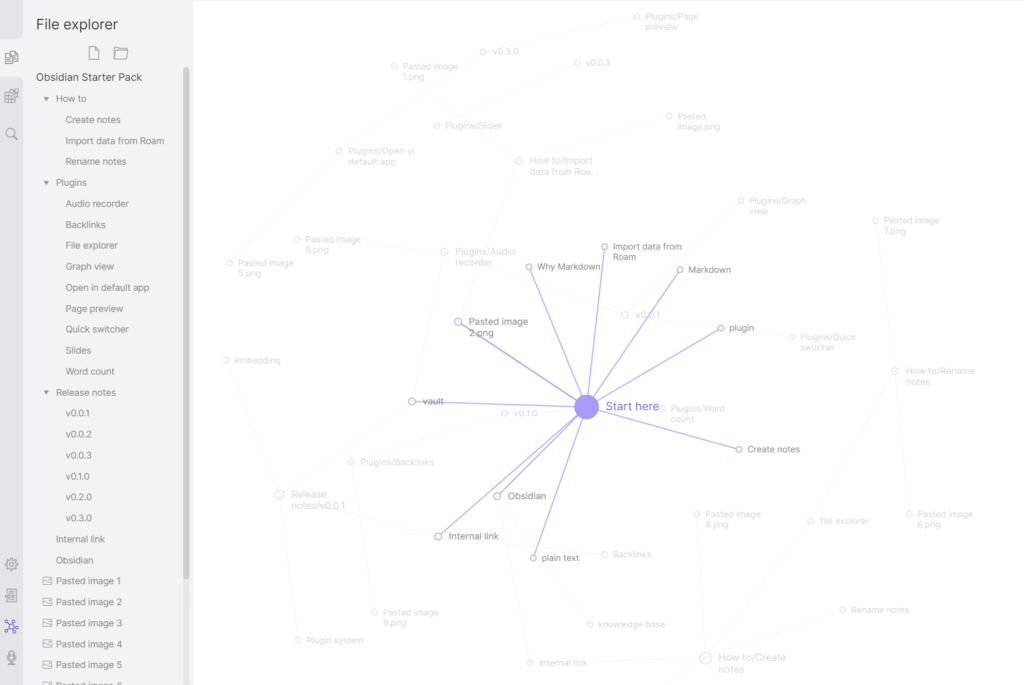
It visually connects ideas across notes.
You begin to see patterns in your thinking.
But there was still one problem.
The Problem: Syncing Across Devices
Obsidian works locally.
Which is great for privacy.
But if you want your notes on:
- laptop
- phone
- tablet
you need syncing.
Obsidian offers their own sync service, but it is paid.
I wanted something that was:
- self hosted
- private
- free
- reliable
This is where Nextcloud enters the picture.
Why Nextcloud is the Perfect Companion
Nextcloud is essentially a self-hosted Google Drive. But open-source.
I personally use this as my self-hosted drive.
It gives you:
• file sync
• WebDAV access
• mobile apps
• file sharing
• version history
In our case, we only need one thing:
File Sync
Because Obsidian stores notes as files.
So the architecture becomes simple.
Architecture Overview
Here’s the system we are building:
Obsidian
     ↓
WebDAV
     ↓
Nextcloud
     ↓
Self Hosted Server (Coolify / VPS)
Devices then connect like this:
Phone (Obsidian)
      ↓
Remotely Save Plugin
      ↓
WebDAV
      ↓
Nextcloud Server
      ↓
Nextcloud Desktop Client
      ↓
Laptop Obsidian
This means:
• one vault
• multiple devices
• fully private
• zero subscription
What You Need Before Starting
To replicate this setup you need:
1. A Server
You can use:
- Hetzner
- DigitalOcean
- AWS
- any VPS
In my case I used:
Hetzner + Coolify
Coolify is an amazing self-hosted platform for deploying apps.
Think of it as:
Self-hosted Heroku
Coolify: https://coolify.io/docs/get-started/introduction
Hetzner: https://docs.hetzner.com/cloud/apps/list/coolify
2. A Domain
Example:Coolify:
nextcloud.explorer.nikhilemmanueld.me
You will point this domain to your server.
Installing Nextcloud with Coolify
Once your server is running:
Go to Coolify → Projects
Click:
Add Resource
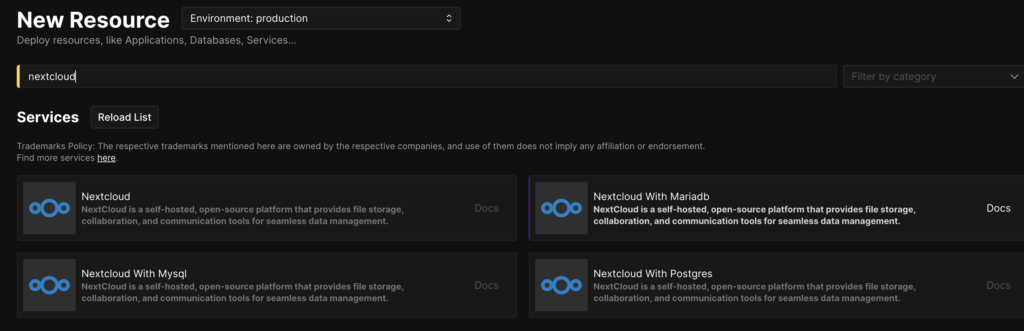
Search for:
Nextcloud
Coolify already has a prebuilt template. Select either one of the option.
If you want to configure database on your own then select only “nextcloud” option. But if you want a database configured then select “nextcloud + DB”.
I wanted a mariadb since my DB is not too complex and yet not too small.
Nextcloud + MariaDB
Nextcloud needs a database.
Supported options include:
- MariaDB
- PostgreSQL
MariaDB works perfectly.
Deploy the Application
Click:
Deploy
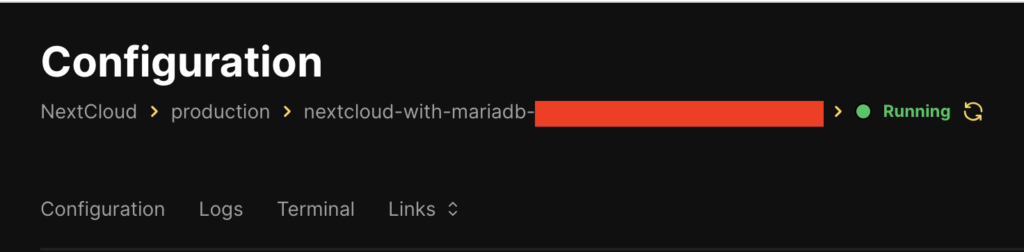
After a few minutes you should see:
Running (Healthy)
First Login to Nextcloud
Open the generated URL.
You will see the setup screen.
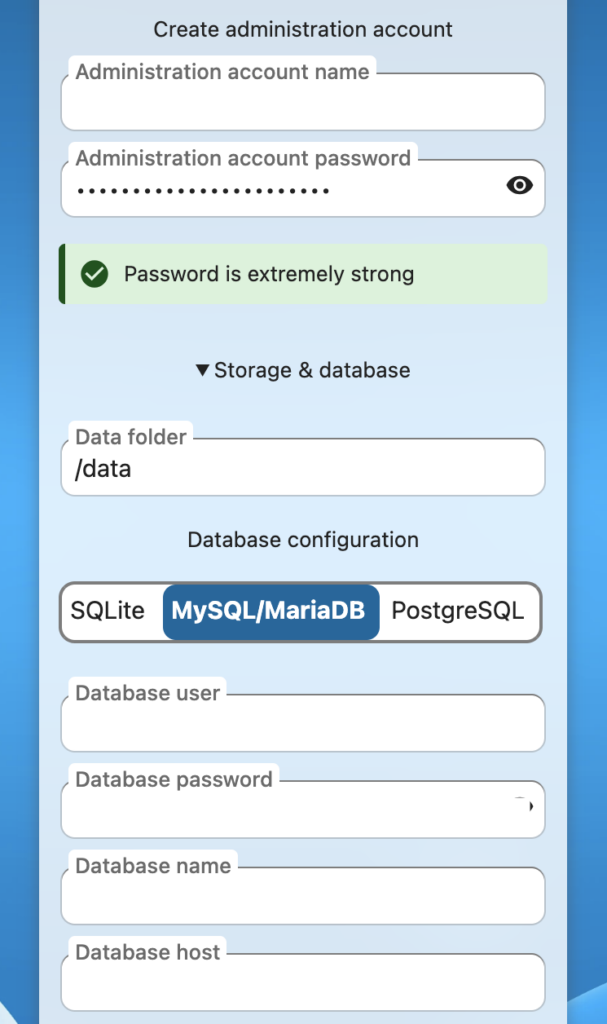
Fields required:
Admin Username
Admin Password
Database
This part confused me initially.
Because the database credentials are generated by Coolify.
You can find them under:
Coolify -> Environment Variables
Example variables:
SERVICE_USER_MARIADB
SERVICE_PASSWORD_MARIADB
MARIADB_DATABASE
Use those values when completing the setup.
Fixing the “Untrusted Domain” Error
When I added my custom domain, Nextcloud showed this error:
Access through untrusted domain
This happens because Nextcloud only allows predefined domains.
The fix is simple.
In Coolify, SSH into your server and edit:
config/config.php
Command:
nano /config/www/nextcloud/config/config.php
Update:
'trusted_domains' =>
array (
  0 => 'localhost',
  1 => 'nextcloud.domain.name',
),
Save and restart.
Now the domain works.
Creating the Obsidian Vault Folder
Once you Inside Nextcloud, you will see a dashboard like this.
Go ahead and click on “Files” and create a new Folders “Obsidian-> MyVault”. The structure should look like the following:

Obsidian
   └── MyVault
This folder will store your Obsidian vault.
Setting Up Obsidian on Mobile
Install:
Obsidian
Nextcloud App
Login to your Nextcloud instance.
I ran into an issue where login would freeze during OAuth.
The workaround is to generate an App Password inside Nextcloud.
Use that password instead of your main login.
Syncing the Vault
Initially I tried using FolderSync.
It seemed promising.
But there was one big issue.
FolderSync kept showing:
Analyzing...
for extremely long periods.
This happens because Obsidian vaults contain many small files inside:
.obsidian/
WebDAV scanning becomes slow.
So I switched to a better solution. At least for me Remotely Save was much easier setup relatively.
The Best Sync Method: Remotely Save
Obsidian has a plugin called:
Remotely Save
It syncs directly to WebDAV.
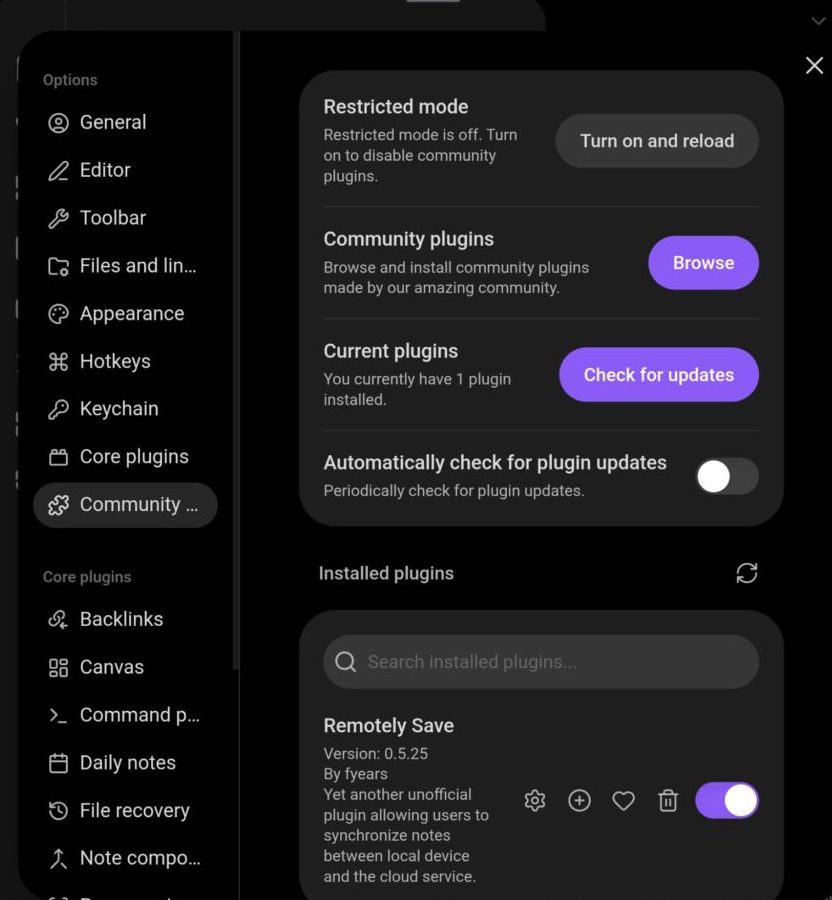
Install it via:
Settings → Community Plugins
Search for:
Remotely Save
Configure WebDAV
This is how the “remotely save” plugin looks.
Choose “Webdav” as your remote server.
Server:
Webdav
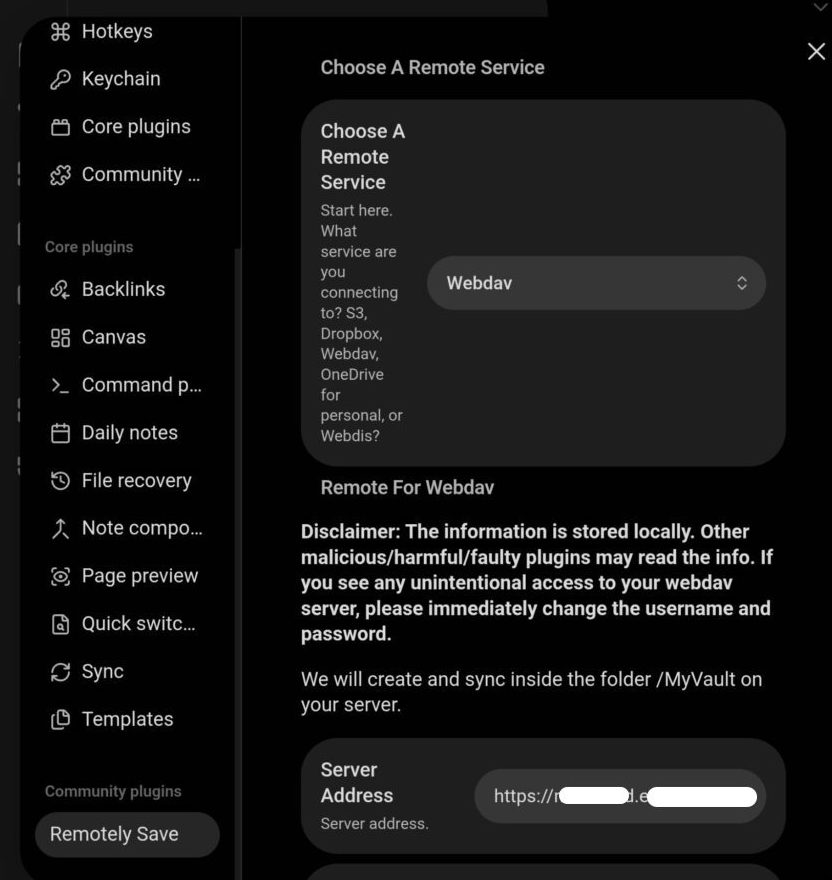
WebDAV path / Server Address:
/remote.php/dav/files/username/Obsidian/MyVault
Remote folder:
Obsidian/MyVault - is the key thing over here. If you miss this, then the notes are gonna be stored in your Files root.
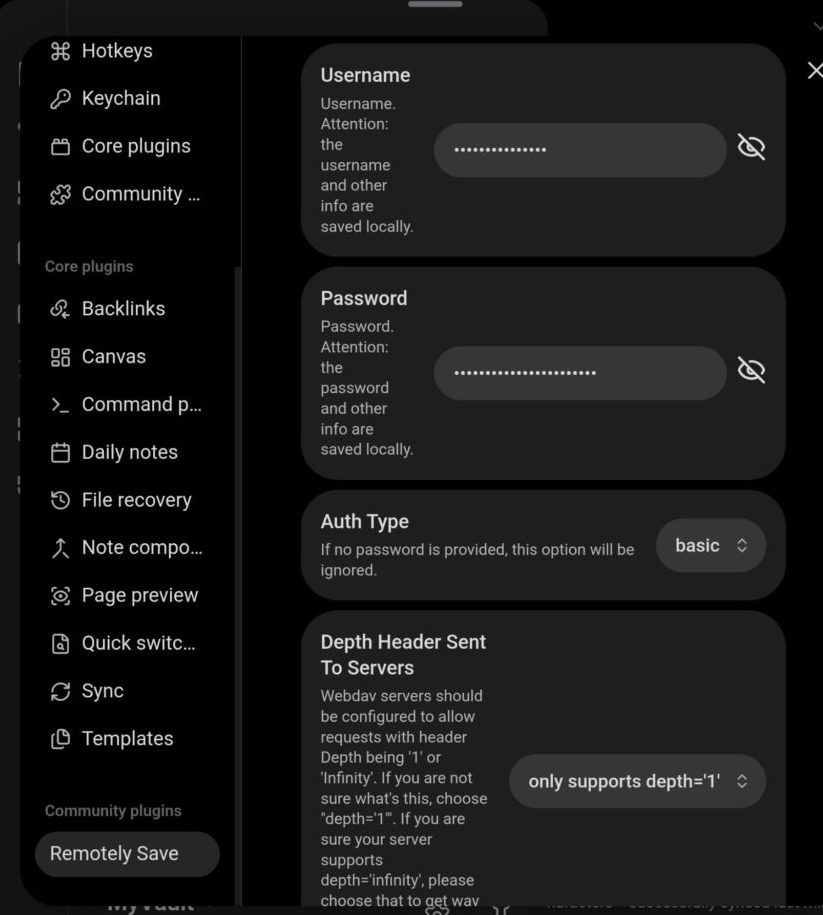
Enter your Nextcloud “username” and “password”. It is stored locally in your pc or smatphone.
Testing the Sync
Create a note:
test-sync.md
Run:
Sync Now
Check Nextcloud.
You should see the file inside:
Obsidian/MyVault
At this point your second brain is fully operational.
Bonus: AI Integration
One interesting extension is connecting local AI models.
Tools like:
Ollama
allow you to run local LLMs.
You can then integrate them with Obsidian plugins to:
• summarize notes
• generate ideas
• connect concepts
If you’d like a guide on that, let me know in the comments.
Troubleshooting
Here are a few issues I ran into.
| Problem | Cause | Solution |
|---|---|---|
| OAuth login stuck | Browser redirect issue | Use App Password |
| Files syncing to root | Remote folder not specified | Set Obsidian/MyVault |
| FolderSync stuck analyzing | WebDAV scanning .obsidian | Use Remotely Save |
| Untrusted domain error | Domain not whitelisted | Edit trusted_domains |
Final Thoughts
What we built here is more than just note syncing.
It’s a private knowledge system.
You now have:
Self-hosted knowledge
Zero subscription
No lock-in
Fully portable notes
Your ideas belong to you.
And that’s exactly how it should be.
If this helped or encouraged you to build your own second brain, feel free to share it or leave a comment.
Your likes and comments encourages me to write more of tech blogs like this.
Discover more from Nikhil Emmanuel's Blog
Subscribe to get the latest posts sent to your email.